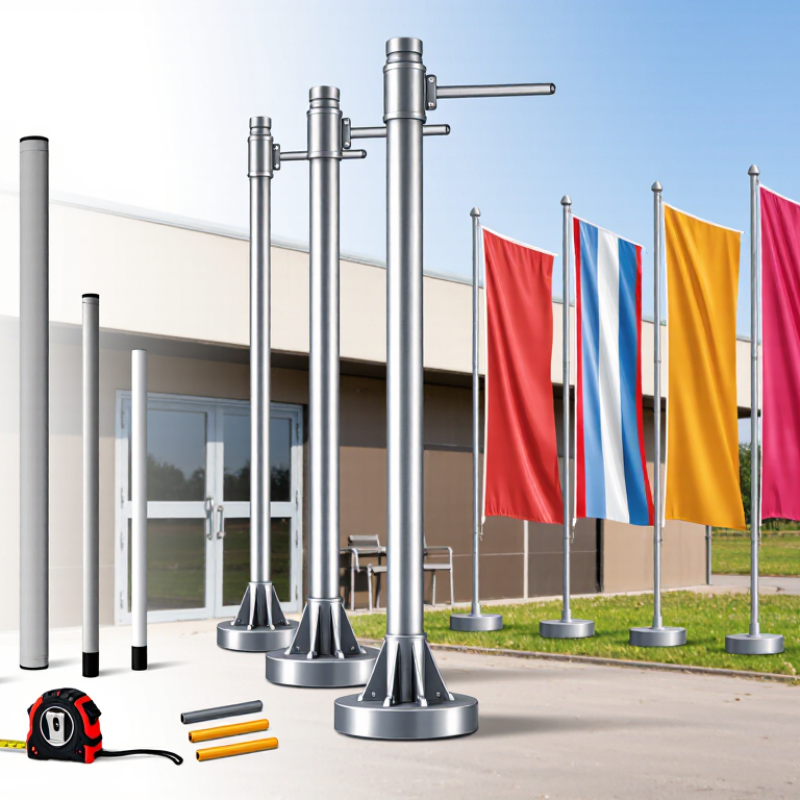

How to Choose the Right Flag Banner Pole?
Choosing the right Flag Banner Pole starts with the flag, the display location, and the conditions it will face. A pole that looks sturdy in a product photo may feel awkward beside a narrow entrance or fail to support a large banner evenly. Check the banner’s height, width, sleeve or attachment style, and total weight before comparing poles. Measure the available space, too. Small details matter.
Material and construction affect handling, durability, and setup. Fiberglass poles are often flexible and lightweight, while aluminum models are generally rigid and easy to carry. Neither material is automatically the best choice. Examine the joints, finish, base, and included hardware, since weak connections can limit an otherwise suitable pole. For outdoor displays, consider typical wind exposure and whether the base can stay stable on the intended surface. Wind is not predictable. A sheltered storefront and an open event field may need very different setups.
It is tempting to choose the tallest option for visibility, but extra height can make transport and installation harder. Consider how often the pole will be assembled, who will set it up, and whether replacement sections or accessories are available. Product specifications are useful, yet they do not tell the whole story; confirm dimensions and compatibility with the seller when details are unclear. I would not rely on appearance alone. A practical choice balances visibility, portability, fit, and expected use, with a little room for uncertainty. The right pole should make the banner easier to display, not create another problem to manage.
Identify the Flag Banner’s Size, Shape, and Display Requirements
How to Choose the Right Flag Banner Pole?
Identify the Flag Banner’s Size, Shape, and Display Requirements
Start with the banner’s actual dimensions, not just its printed name. A tall feather flag needs a different pole and base from a compact rectangular banner. Check the sleeve or pocket design, too. The pole must fit securely without stretching the fabric or leaving it loose. A poor fit can twist the banner and make its message harder to read.
Consider where and how the banner will be displayed. A pole used indoors may need only a stable floor base, while an outdoor setup needs a base suited to the surface and expected conditions. Measure the available height and width, including clearance near ceilings, signs, or walkways. Small details matter. One easy mistake is choosing a pole by height alone; the banner’s shape and mounting method matter just as much.
Tips: Confirm the banner’s width, height, and pole-pocket dimensions before buying. Check the assembled height in the intended location, and make sure the base stays steady on that surface. If you are unsure, compare the pole specifications with the banner’s setup instructions. I’d double-check the fit—dimensions can be surprisingly easy to misread.
Compare Pole Materials, Designs, and Mounting Options
Choosing a flag banner pole means matching its material to the display location. Aluminum is light and easy to carry between events, while steel offers greater stiffness but adds weight. Fiberglass can flex in gusts, though repeated bending may wear its joints. No material solves every problem. Check the pole’s stated size and wind guidance before buying, and inspect connectors for a snug fit.
Pole design affects how the banner hangs and travels. Sectional poles pack neatly into a carry bag, but loose or damaged joints can make setup frustrating. Telescoping designs adjust quickly; their locking sections should extend smoothly and hold firmly. Curved or angled tops help shape feather-style banners, while straight poles suit rectangular flags. Small differences matter.
Mounting options should match the ground beneath the banner. A ground spike works in firm soil, but may wobble in loose sand. Cross bases sit on pavement and often need a weight plate in breezy conditions. Wall brackets save floor space, provided the surface and fasteners can support the load. Test the assembled pole before an event. A quick setup can still hide a weak connection. Check it again after moving the banner or changing its location.
Match Pole Height and Base to the Display Location
Choosing a flag banner pole starts with the display location, not the tallest option on the shelf. Measure the available height, including ceilings, tree branches, and nearby signs. Measure the spot. Indoors, a shorter pole can keep the banner clear of lights and doorways. Outdoors, extra height may improve visibility, but only if the flag won’t block walkways or sightlines.
Match the base to the surface. A ground spike suits firm soil, while a flat cross base is often more practical on pavement. For temporary displays, a water-fillable base can add weight without being difficult to transport. Check that the base fits the pole’s connector and that its footprint won’t create a trip hazard. Bigger is not always better; crowded entrances need room for people to pass.
Wind changes the calculation. An exposed plaza needs a more stable setup than a sheltered lobby, but no base makes a banner suitable for every gust. Follow the pole and base maker’s setup limits, and lower or remove the display when conditions exceed them. There’s no perfect height for every site. It’s easy to focus on visibility and forget the base; that small oversight can make an otherwise neat display feel awkward.
How to Choose the Right Flag Banner Pole? - Match Pole Height and Base to the Display Location
| Display location | Typical pole height | Suitable base or mounting option | Why it can work | Key checks |
|---|---|---|---|---|
| Indoor booth or small shop display | About 6–8 ft (1.8–2.4 m) | Cross base or compact flat-floor base | A shorter setup is easier to fit beneath ceilings and around nearby displays. | Allow room for the banner to move without touching people, lights, or merchandise. |
| Indoor lobby or trade-show aisle | About 8–10 ft (2.4–3.0 m) | Cross base, optionally with a compatible weight plate | Provides visibility above many floor-level displays while remaining suitable for common indoor spaces. | Check ceiling clearance, foot traffic, and whether the venue permits weighted bases. |
| Outdoor grass or soft soil | About 8–12 ft (2.4–3.7 m), if the system supports it | Ground spike designed for the pole system | A spike can anchor the display directly in suitable ground without relying on a flat floor. | Confirm soil conditions, underground utilities, pole compatibility, and safe use in the expected weather. |
| Outdoor pavement or other hard, level surface | About 8–10 ft (2.4–3.0 m), subject to the system’s instructions | Compatible water-fillable base or purpose-made weighted base | A weighted base avoids the need to insert a spike into the ground. | Use only on a stable, level surface. A weighted base does not make a banner suitable for every wind condition. |
| Wall, fence, or fixed structure | Choose pole length to suit the banner and available clearance | Purpose-designed wall or structure mount | A fixed mount can be useful where a floor base would obstruct access or take up space. | Check the structure, fasteners, installation permission, and mount compatibility before fitting. |
| Low-ceiling room or restricted area | Use the shortest height that keeps the banner visible and clear of obstructions | Compact base suited to the floor and display system | A lower pole reduces clearance conflicts in confined spaces. | Measure from the floor to the lowest obstruction, including lights, signs, and doorways. |
Pole heights are general planning ranges, not universal specifications. Check the banner dimensions and the pole-and-base system’s instructions, and follow venue guidance and local weather conditions when displaying outdoors.
Assess Wind Resistance, Durability, and Weather Conditions
How to Choose the Right Flag Banner Pole?
Start with the wind where the flag will actually stand. A sheltered shop entrance and an open roadside corner can need very different poles. Gusts often matter more than the average forecast.
Wind changes everything. A flexible pole can bend and recover, while an overly rigid one may transfer more force to its base. Check the pole’s recommended flag size and wind rating, if available.
A large banner catches more air, much like a small sail. If the location gets frequent strong gusts, choose a shorter flag or take it down when conditions worsen.
Durability depends on more than the pole material. Fiberglass can flex, while aluminum is light and resists corrosion, but construction and joints matter too. Inspect connectors, sleeves, and exposed fasteners for weak points.
Check the base. Soft ground may need a ground spike, while pavement usually calls for a weighted base that cannot rock easily.
Rain, sun, salt spray, and freezing temperatures can wear down finishes and fittings over time. Rinse off grit and salt, then let the pole dry before storage.
It is easy to focus on the pole alone; I’d also check whether the flag sleeve fits snugly, since loose fabric can flap hard and fray at the edge.
A little extra checking helps, though it cannot make an exposed site calm.
Check Banner Compatibility, Assembly, and Maintenance Needs
How to Choose the Right Flag Banner Pole?
Check the banner before choosing a pole. Measure its sleeve opening and compare it with the pole’s diameter. A snug fit keeps the fabric from sliding, but a tight sleeve may snag during setup. Check the banner’s height and attachment style, too. Some designs use a curved top section; others need a crossbar or separate connectors. It is easy to assume poles are interchangeable. They are not always.
Tips: Lay out every section before assembly. Check that the connectors fit without force. Small details matter. If the banner will be used outdoors, confirm the pole and base are intended for those conditions. Wind can strain a tall, flexible pole, even when the fabric seems light.
Follow the assembly instructions and lock each joint securely. If a section will not seat, stop and check its orientation rather than pushing harder. After use, wipe dirt from the pole with a soft, damp cloth and let it dry before storage. Inspect joints, caps, and flexible sections for cracks or looseness. A small defect can become harder to spot once the pole is assembled. Store the parts in a dry place, ideally in their carrying bag. I would not skip the inspection, even when setup looks fine.

Catalog
Replacement Cushions
New Jersey Catalog